

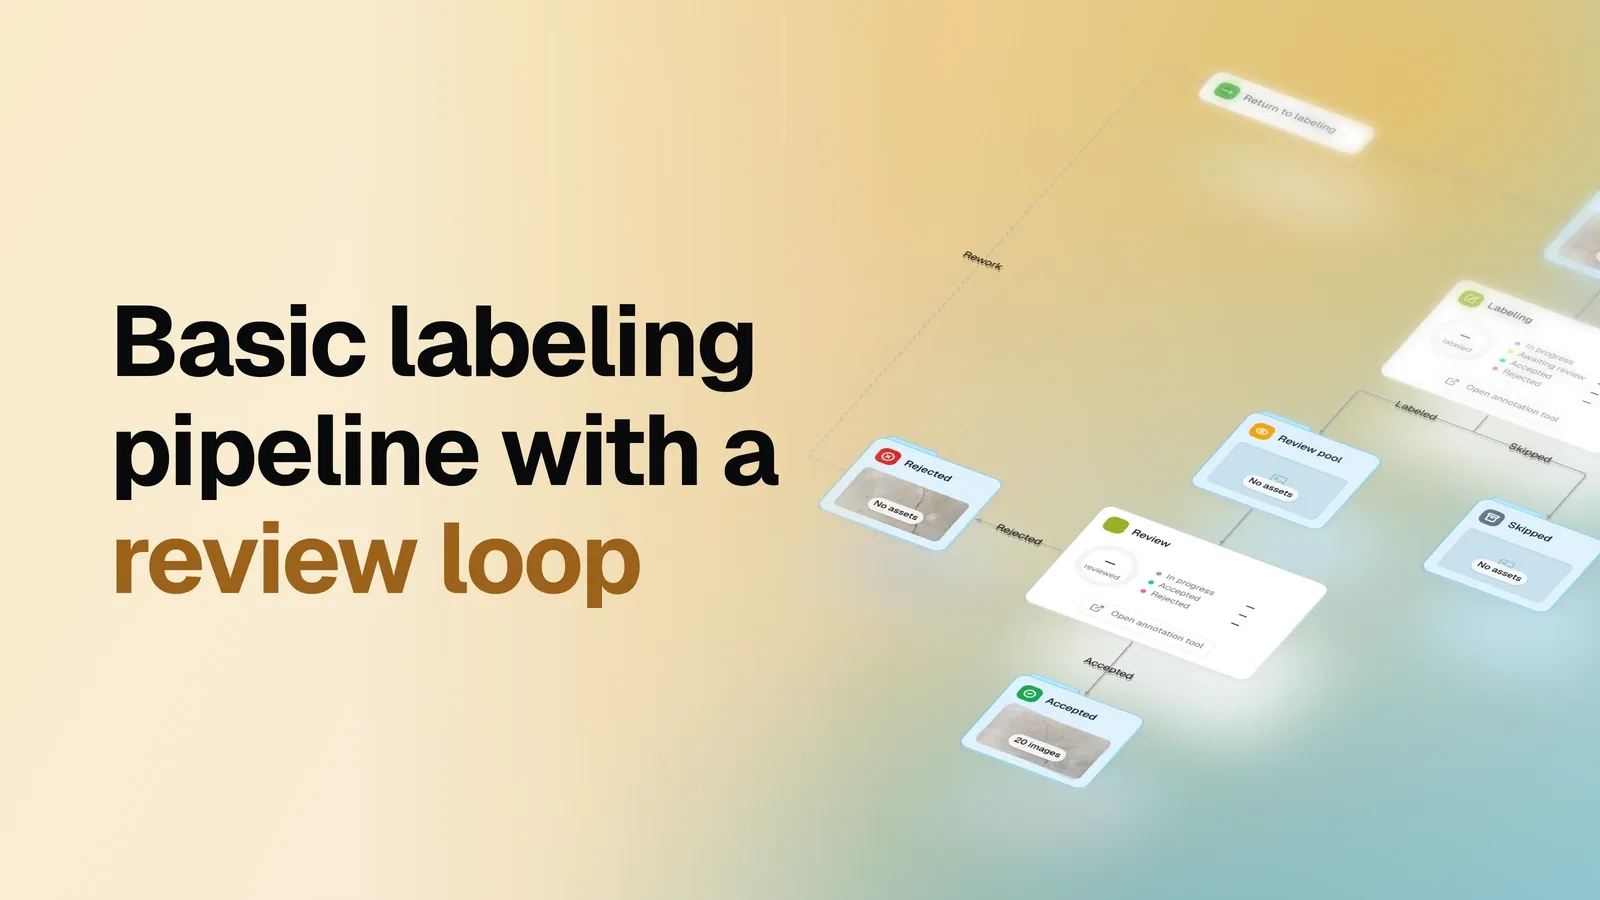
Labeling with a team gets messy fast: images get lost between people, reviews pile up, and fixes slip through.
The Basic labeling pipeline template in OvalBee keeps it in order. Images go through a labeling and review loop until accepted, and the graph shows where each one is right now. Use it as the starting point for your next labeling project.
It takes a minute to set up and can be customized for your needs (add pre-labeling, quality checks
or other stages). In this post we run it on a real task: two labelers and one
reviewer label photos of power line insulators with three classes: insulator,
pollution-flashover and broken.
Here is the live graph from this run. It’s read-only: open any node to see its settings and where each image is right now.
How images move through the pipeline
Before the details, here is a high-level scheme of how the graph works. It’s simplified on purpose: it skips settings and some nodes and shows only the main idea. The scheme is a short animation in two parts:
- One image. The animation follows a single image. It goes from the labeling pool to a labeler, then to review. The reviewer rejects it, so it goes back to the pool. Another labeler fixes it, and this time the reviewer accepts it.
- The whole team. Then it shows everyone at work. Two labelers label at the same time, each from a personal queue, and the queues refill from the pool.
- Labeling pool Images wait here until a labeler takes them.
- Labeling A labeler takes an image and annotates it.
- Review The reviewer accepts or rejects each image.
- Rework Rejected images go back to be fixed.
- Results Accepted images land in the final dataset.
All the work happens in two nodes, Labeling and Review: this is where people label and check images. The rest are datasets, one per stage, plus Return to labeling, which moves rejected images back for rework. Every image sits in exactly one dataset at a time, so you can open any stage and see which images are skipped, rejected or accepted right now. The full list of nodes is in the node reference at the end of the post. For the full picture of labeling in OvalBee, see Labeling in the docs.
Set up the template
✨ Ready in a minute: there is nothing to prepare in advance. The setup wizard is your assistant: it walks you through every step and builds the rest for you.
When you open the template, the wizard asks three questions: what you will label, who does the work and where the images are. You pick the classes, choose labelers and reviewers from your workspace, select a dataset or start with an empty one, and press Start.
Nothing is created before Start, so you can stop at any step and come back later. After Start, OvalBee creates the datasets and starts the pipeline. No further configuration is needed.
Add your images
Our images were not in OvalBee yet, so we added an Import drag & drop node in front of the labeling pool and dropped 50 photos onto it. They landed in the Labeling pool and reached the labelers’ queues right away, without running anything.
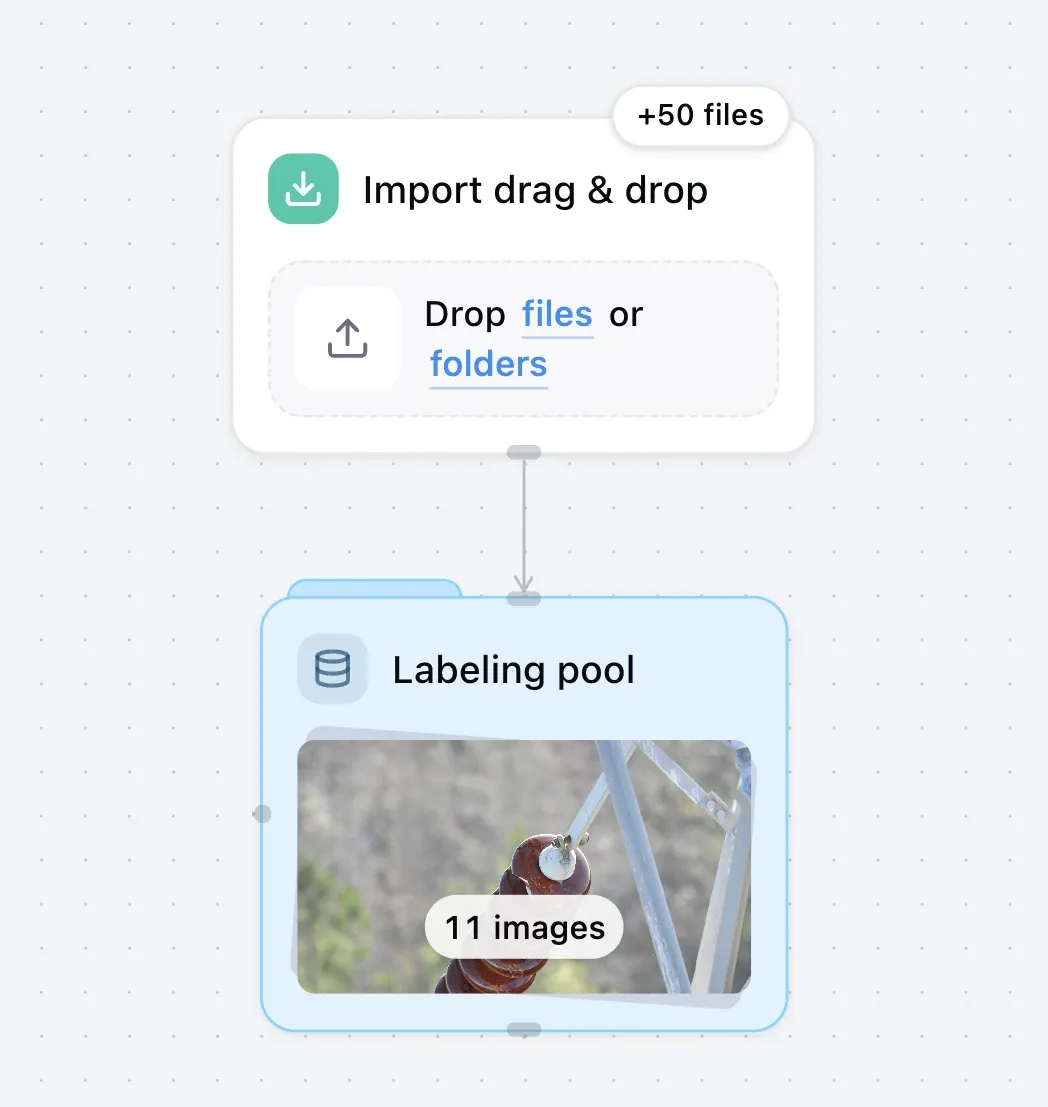
The photos come from the public Insulator-Defect Detection dataset on Dataset Ninja. The same way, you can import a public dataset from Dataset Ninja or copy images from Supervisely.
Dataset: Insulator-Defect Detection on Dataset Ninja, CC BY 4.0.
Paper: Zheng J., Wu H., Zhang H., Wang Z., Xu W. Insulator-Defect Detection Algorithm Based on Improved YOLOv7. Sensors, 22(22), 8801, 2022.
Start labeling
Each labeler clicks Open annotation tool on the Labeling card and gets a personal queue of images taken from the shared pool. When they finish an image, a new one takes its place, so nobody has to pick work by hand and two people never label the same image.
Any number of people can work in parallel, each with their own queue. In our run, two labelers took work from the same pool at the same time. An image left in a queue for too long goes back to the pool with its saved annotations, and so do the images of a labeler you remove from the node.
Buttons route images
Labeling and Review share one simple idea. Their settings have a Decision buttons field: a list of pairs, each a button name and a dataset.
💡 Key idea: every pair becomes a button in the annotation tool. Press it, and the image moves to that dataset with its annotations, at once.
In this template, Labeling has Submit for the Review pool and Skip for Skipped. Review has Accept for Accepted and Reject for Rejected. Need another decision, such as sending hard cases to an expert? Add a pair, and the tool shows the new button. The statistics page counts it too: every button becomes its own outcome there, as shown in Detailed statistics.
Review and rework
The reviewer opens the tool from the Review card and gets a personal queue from the Review pool. They check each image and press Accept or Reject. Reviewers judge the work and labelers fix it, so the roles stay clear.
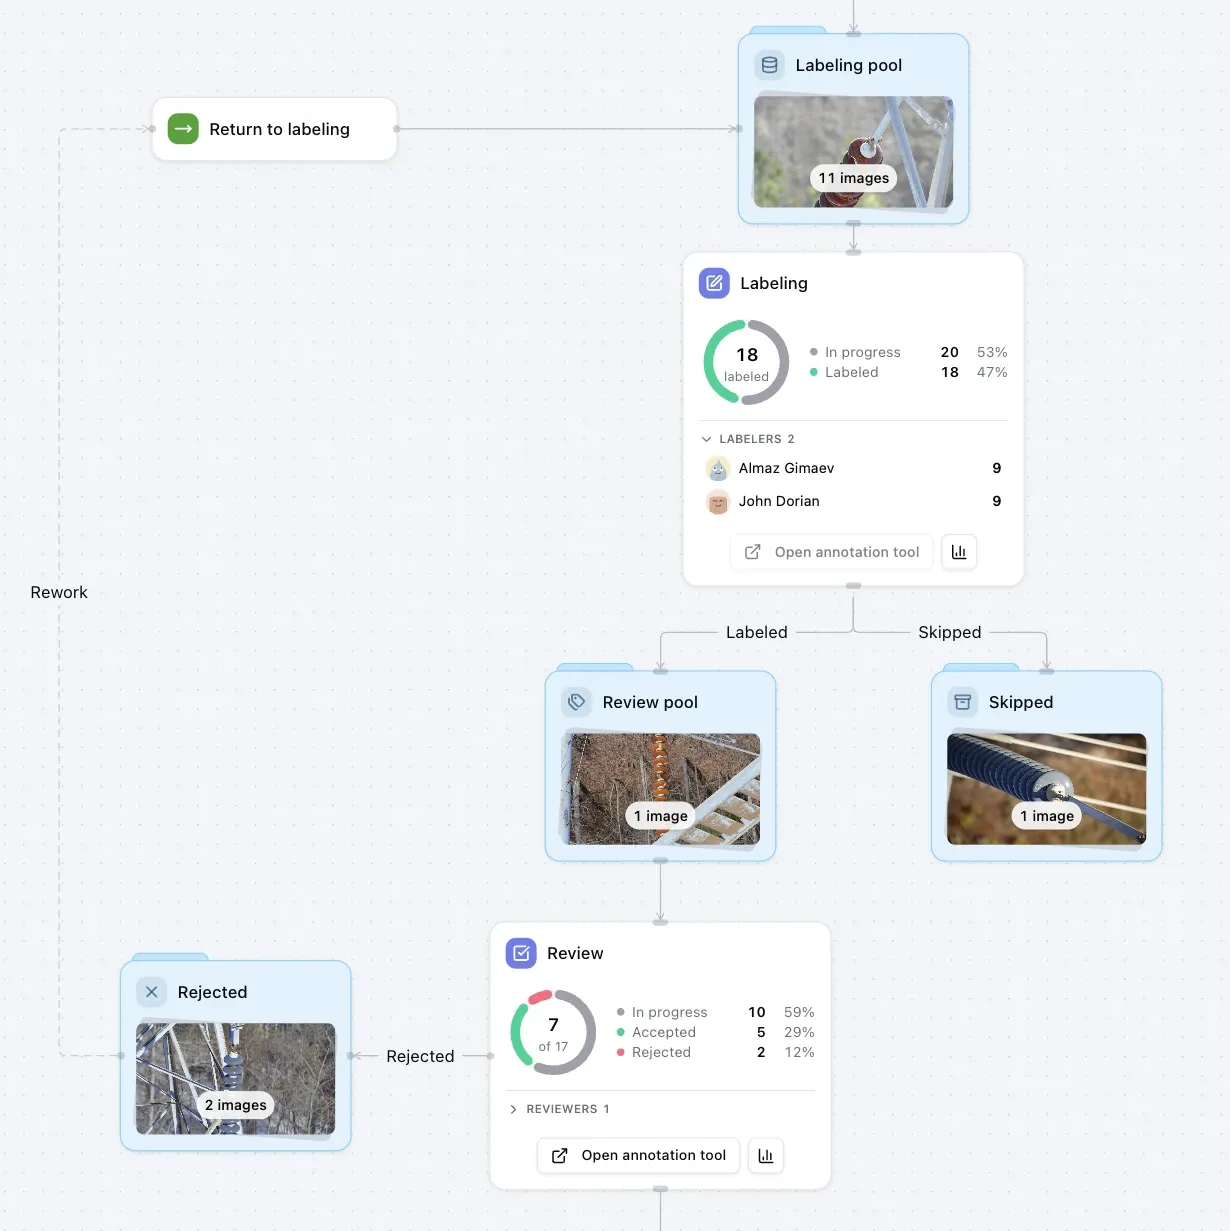
Rejected images wait in Rejected until Return to labeling sends them back to the pool with their annotations in place. The first labeler with room in their queue picks them up, fixes them and submits them for review again. Run the node by hand when you want rework to start.
⏱️ Tip: put Return to labeling on a schedule, for example every hour, and rejected images go back to the labelers on their own.
Roles and access
Labeling is often one part of a bigger pipeline, next to active learning, training and other stages. Workspace roles give each person only the part they need. Someone becomes a labeler or reviewer when you add them to the Labeling or Review node, and their role decides what else they can see.
| Role | What they can do |
|---|---|
| Collaborator | Sees only their own labeling or review tasks and opens them in the annotation tool. The rest of the pipeline stays hidden. A good fit for labelers and reviewers. |
| Viewer | Sees flows and their results, but changes nothing. A good fit for managers and clients who follow progress. |
| Operator | Sees and runs flows, but does not edit them. |
| Admin | Full control over flows, data and members. |
🪄 Pro plan: roles and per-flow access come with the Pro plan. Invite outside labelers or a client, and each person works only on their own part. Pro also brings an audit log, more credits and storage, and other upgrades. Larger teams can also choose Enterprise, with single sign-on, a dedicated cluster and onboarding from our experts. Read how roles work in Members and roles.
Track progress
Status on the graph
The Labeling and Review cards show live status while people work: how many images are in progress and how many are done, in total and per person. Review also splits the finished work into accepted and rejected.
At the moment of this snapshot, the two labelers had submitted 18 images, with 20 more in their queues. The reviewer had checked 7 of the 17 images that reached review: 5 accepted and 2 sent back for rework.
Detailed statistics
For the full picture, open the statistics page. There are two ways in:
- the Statistics button (the chart icon) next to Open annotation tool on the Labeling or Review card;
- the Labeling page in the sidebar.
The Labeling page lists every labeling and review task in your workspace: the node and its flow, who is assigned, how many images sit in queues and when the last work happened. From any row, people assigned to the task continue in the annotation tool, and anyone opens its statistics. Labelers with the Collaborator role see only their own tasks here, so this page is where their work starts.
The statistics page puts every number about the work in one place:
- Totals per stage: images submitted, the backlog in queues and in the pool with an estimate of when it clears, time in the tool with the median per image, and objects created, updated and deleted.
- Outcomes: how many images went through each button, plus a chart of submissions per day.
- Members: the same numbers for every person, from submitted images to the last submission.
- Review results per labeler: how each labeler’s work did in review and the median time to a verdict.
- Classes: objects per class, with what was created, updated and deleted.
- Image history: every image with its last step and outcome. Expand a row to see each step: who worked on it, which button they pressed and how long it took.
Filter everything by node, person, class and period: the last 24 hours, 7 or 30 days, all time or your own range. Members, classes and images export to CSV for your own reports. Collaborators see only their own numbers. Every part of the page is explained in Labeling statistics.
💡 Your buttons, your outcomes: the statistics page counts every pair in Decision buttons as its own outcome, under the name of its dataset. Add a Needs expert button that sends images to a Needs expert dataset, and Needs expert appears next to the other outcomes, with no extra setup.
The result
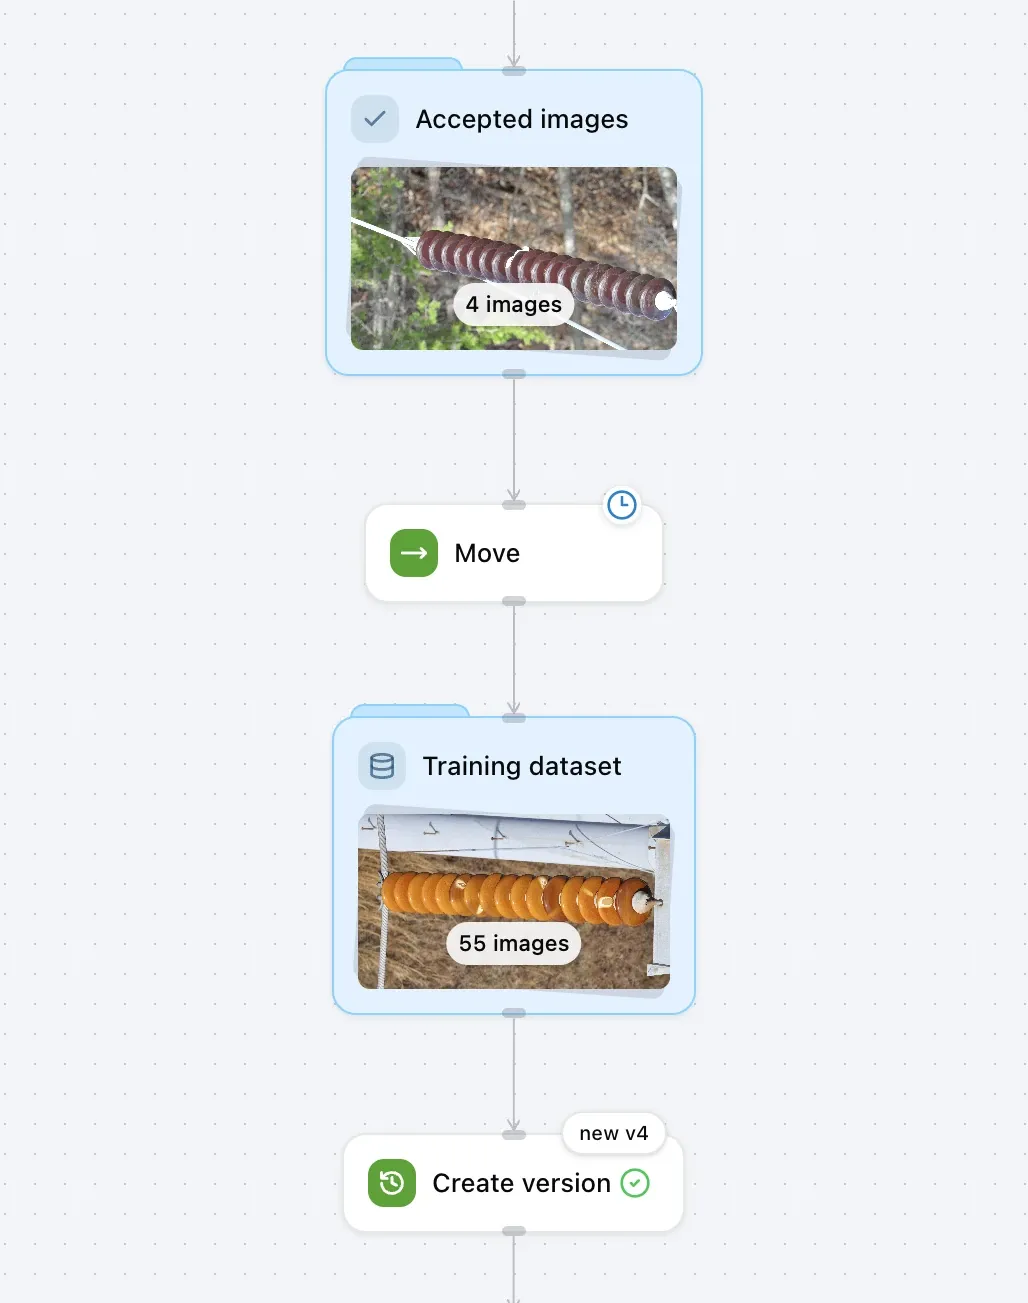
Accepted images collect in the Accepted dataset with their annotations, ready for training or the next step of your pipeline. Images a labeler skipped stay apart in Skipped, so you can look through them later and decide what to do with each.
From here, a natural next step is a Move node on a schedule, for example every day. It sends newly accepted images to a Training dataset, so Accepted holds only the latest batch. A Create version ↗ node then saves the training dataset as a new version. Each version holds everything from the previous one plus the new images, so the dataset grows step by step and every earlier state stays in its history. The nodes after it read that saved version, so you always know exactly which data a model was trained on.
Beyond that, the pipeline grows with your project. Split the data, train a detector, compare it with the previous model, or close the loop with active learning, where the model picks the next images worth labeling. Every step is one more node on the same graph, so your labeling, data and models live in one place, and you always see how they connect.
Node reference
Every node of the template, with a link to its documentation.
| Node | What happens |
|---|---|
| Labeling ↗ | Labelers annotate images and press Submit or Skip. |
| Review ↗ | The reviewer checks each image and presses Accept or Reject. |
| Labeling pool (dataset ↗) | Images wait here for labelers. |
| Review pool (dataset ↗) | Submitted images wait here for a reviewer. |
| Accepted (dataset ↗) | Images that passed review, with their annotations. This is the result. |
| Skipped (dataset ↗) | Images a labeler set aside, kept out of the loop. |
| Rejected (dataset ↗) | Rejected images waiting for rework. |
| Return to labeling (Move ↗) | Sends rejected images back to the labeling pool with their annotations. |